Modelling Indian Railways in bricks - I
Contents- This page: Overview and Basic Geometry
- Page 2: Passenger & Freight Stock
- Page 3: Diesel & Electric Locomotives
Overview
Let me start off by saying that modelling just about anything in LEGO® is a lot of fun, and if you like Indian Railways, you'll enjoy what I've put together on this page. I will not be going into the details about the various intricacies involved with the geometry of LEGO®, (For more on that, you can go later to one of the links listed.) Rather, I will try to briefly explain the main areas in LEGO® trains which will be posing challenges specific to anyone starting to try their hand at building IR models out of LEGO® for the first time.
The challenge of modelling with LEGO® trains
The main challenge that LEGO® poses to its train builders is its track. The gauge of this track does not match any specific gauge currently available, but has its own gauge which is unofficially known as the 'L' gauge. This gauge is somewhere in between O and S gauges. This gives rise to a problem of matching the scale to that of the LEGO® minifgures, which are 2 bricks wide x 5 bricks high. (Bricks and plates are the standard LEGO® units of measurement.)
This has lead to a divided opinion over whether LEGO® trains should be 6 studs wide (since all official LEGO® sets are like this), or 8 studs wide (which is approximately to the scale of 1 : 40). With regards to length, 6-wides look nice with a 1 foot equals ½ a stud scale, whereas 8-wides look good with either 1 foot equals 1 stud, or 1 foot equals ¾ of a stud, depending on the bricks and space available to you. Whatever your choice, the simple techniques shown here should be very helpful. Also, LEGO® track comes only in one arc, which, combined with Bo-Bo only motor, is quite a challenge to overcome. Although it has an extremely robust design (remember, they're originally for kids :)) capable of lasting a long time if treated with a reasonable amount of care, the wheel sets of the motor are in a Bo-Bo configuration as seen here:
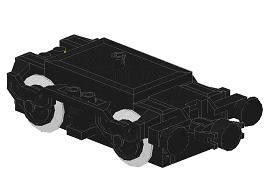
This is not very helpful to us, since most of today's Indian locomotives (with the exception of the WDP-1 and the WAP-5) have Co-Co wheels. I will discuss this problem in greater detail in a later section. Here are links to some flexible solutions to these problems (builder credit is in brackets)
- Concealing the motor as a fuel tank (Samarth Moray, that's me :) ) (brickshelf.com)
- Integrating the motor to a Co-Co configuration by adding an extra wheel set (Mike Kollross)
- Putting the motor in one of the coaches/tender of your locomotive (Reinhard "Ben" Beneke) (brickshelf.com) and also another page by him (brickshelf.com).
The geometry
As I mentioned earlier, I would not go into detail about the many various aspects of the geometries of LEGO® bricks, but there are some that concern us more than others, since they are the ones involved in our models.
The 5 : 2 ratio: A lot of our modelling efforts will revolve around this ratio. The ratio simply means that five LEGO® plates, when stacked on each other horizontally, are equal to one LEGO® plate lying vertically. Let me illustrate:
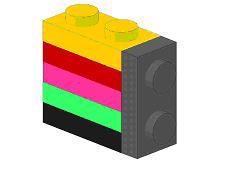
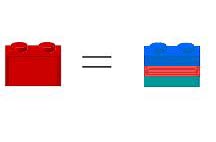
This geometry follows from the one that says that 1 LEGO® brick equals 3 LEGO® plates (shown above). Simple, isn't it? And yet it has many great applications, which will be shown later.
Slope brick striping: This little geometry is useful in making stripes and liveries. When an inverted slope is raised by one plate, it can form an angled section with a complementary slope which has been lowered by one plate.
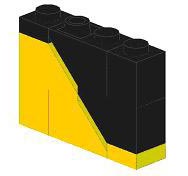
Although there is still a tiny gap left between where the two slopes meet, many people, including myself, think this method is far more satisfying than using computer-generated stickers and decals.
Half-stud offsets: The best part about LEGO® is the fact that you are not restrained to any specific geometry, thanks to these half-stud offset bricks. They let you shift and change geometries to an odd number of studs:
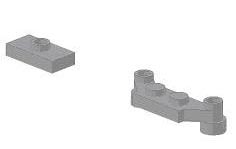
Well, that's it! You are now aware of the basic geometries of LEGO® bricks, and we can now move on to seeing their applications in building ourselves some great IR models. If you want to study these and other geometries in more detail and get an even better understanding of their uses, I strongly recommend you visit these links:
Also try these links for more information on LEGO® trains in general:
Now that the basics are out the way. The next obvious step would be to select the object (in our case, IR trains) which you want to replicate in the brick. Accordingly, you must then break down what you see and then try and find a 'LEGO® version' of it. It's a simple yet very effective formula, which is demonstrated in the following sections on passenger, freight stock and locomotives.
